I love the amazing ideas featured in this site. What a great help when we did some home improvements! Thanks IdeasToLove Team! 🙂
Larah
I was really amazed when I saw several do-it-yourself stuffs in this site. In fact, I made some and sold those to my friends. I may be putting a business for amazing crafts and I will get some more pretty ideas from this site. IdeasToLove.com is really a big help to me and to my family. Thanks Ideas to Love Team! 😀
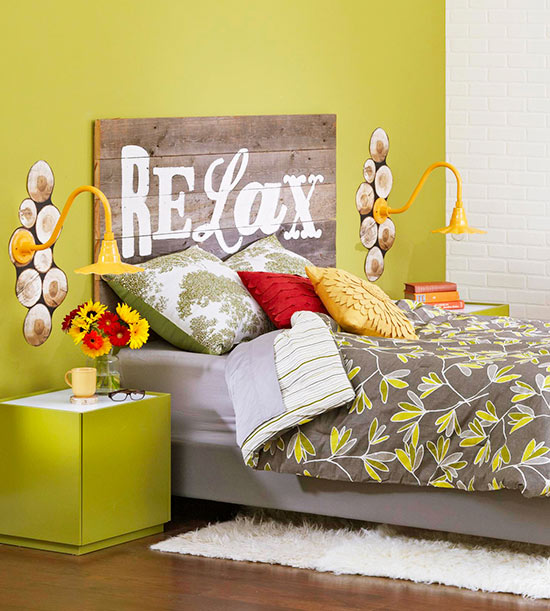
Emblazoned with the mantra “relax,” this headboard gives the invitation to do just that. To build this headboard, scout out old floorboards, barn wood, or other cast-off wood from architectural salvage shops or Craigslist. Check any paint on the wood for lead (testing kits are available at home centers). Remove nails and other sharp objects, and sand well.
Cut boards to desired size with a table saw. (Our boards are 60 inches long to fit a queen-size bed.) Sand the boards. Cut three 1x2s to 2 inches shorter than the height of your headboard (our headboard’s total height is 40 inches, so our 1x2s are 38 inches); these are the headboard’s back supports. Position salvaged boards with front sides down; place supports perpendicular to the boards. (Ideally, these supports will line up with the studs in your wall.) Screw the supports into the boards. To add the stenciled embellishment, arrange your letters on the headboard and trace around them with a marker. Use crafts paint (interior latex paint also works well) to fill in the letters, covering the lines. Screw the headboard into the studs in your wall, or screw heavy-duty hangers into the 1x2s to hang the headboard.


Comments are closed.